
Title: How to Fix a Dry Ink Cartridge: A Comprehensive Guide
Introduction: Are you facing the frustrating issue of a dry ink cartridge in your printer? Don’t worry, we’ve got you covered! In this article, we will walk you through effective methods to revive and fix your dry ink cartridge, helping you save time and money. Let’s dive in and get your printer back up and running smoothly!
Troubleshooting Dry Ink Cartridges: A Step-by-Step Guide to Fixing Common Printing Problems
Troubleshooting Dry Ink Cartridges: A Step-by-Step Guide to Fixing Common Printing Problems.
If you’re experiencing issues with your printer not dispensing ink properly, it may be due to dry ink cartridges. This can happen when the ink inside the cartridges dries up, preventing it from flowing smoothly onto the paper. However, there are steps you can take to troubleshoot and fix this problem.
Firstly, remove the ink cartridges from your printer and check if they are indeed dry. You can do this by gently shaking the cartridge to see if you hear any liquid sloshing around. If it seems empty or nearly empty, it’s likely that the ink has dried up.
Next, clean the ink cartridges using a soft, lint-free cloth. Dampen the cloth with distilled water and gently wipe the nozzles and contacts on the cartridges. This helps remove any dried ink or debris that may be blocking the flow.
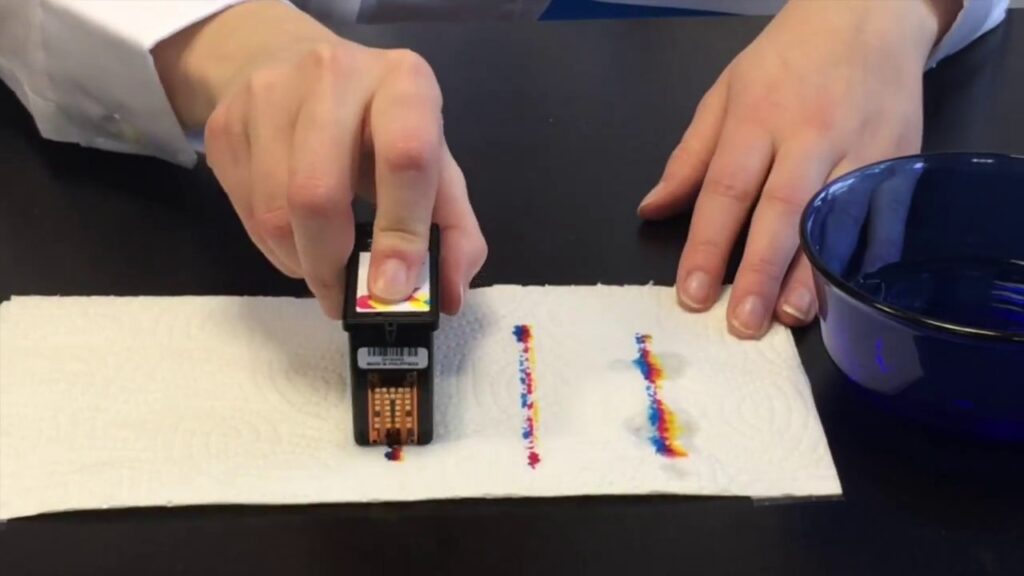
If cleaning the cartridges doesn’t solve the issue, you can try rehydrating the ink. Fill a small bowl with warm water and place the cartridges in it, making sure the nozzles are fully submerged. Leave them in the water for about 10 minutes, allowing the warm water to soften and dissolve any dried ink.
After rehydrating, remove the cartridges from the water and dry them thoroughly with a clean cloth. Make sure no water remains on the cartridges before reinserting them into the printer.
Once the cartridges are back in place, run a test print to see if the problem has been resolved. If the ink is still not flowing properly, you may need to consider replacing the cartridges altogether.
Remember, regular usage and proper printer maintenance can help prevent ink cartridges from drying out. It’s also a good idea to store unused cartridges in a cool, dry place to prolong their shelf life.
By following these troubleshooting steps, you should be able to fix common printing problems caused by dry ink cartridges.
Frequent Questions
How do I fix a dry ink cartridge?
To fix a dry ink cartridge, you can try a few methods. First, remove the cartridge and gently clean the printhead with a lint-free cloth soaked in distilled water. Then, dry it thoroughly before reinstalling. Alternatively, you can soak the printhead in warm water for a few minutes to unclog the dried ink. Remember to always follow the manufacturer’s instructions and consider replacing the cartridge if the issue persists.
What are the common reasons for a dry ink cartridge?
The common reasons for a dry ink cartridge can include prolonged periods of non-use, improper storage, or excessive exposure to air.
Are there any DIY methods to revive a dry ink cartridge?
Yes, there are several DIY methods to revive a dry ink cartridge. Some common methods include soaking the cartridge in warm water, gently shaking it, or using a cotton swab soaked in rubbing alcohol to unclog the nozzles. However, results may vary and it’s always recommended to consult the printer manufacturer’s guidelines before attempting any DIY methods.
In conclusion, resolving dry ink cartridge issues is crucial to ensure smooth printing operations and optimal print quality. By following the steps outlined in this article, users can effectively revive their ink cartridges and avoid costly replacements. Remember to regularly check ink levels, clean print heads, and store cartridges properly to prevent them from drying out. By implementing these simple maintenance techniques, users can extend the lifespan of their ink cartridges and maintain consistent printing performance. Stay informed and keep exploring innovative solutions to enhance your technology experience.